Tagging Images
Terminology
Event: An Earth science event (for example, hurricane, cloud streets, etc).
Untagged: Newly imported or extracted images will have no tag.
Tag: When a user marks an image as either having or not having a particular Earth science event, the user has created a tag on the image. There is a limit of one tag per image.
Present: The tag created when an image contains the Earth science event.
Not Present: The tag created when an image does not contain the Earth science event.
Selecting Images for Tagging
After changing map output to the desired settings and exploring the map to the desired settings, users can draw a rectangular bounding box around a feature for extraction using the icon  . Please note that although drawing polygons
  and polylines
  are also supported, this feature only results in shapefiles, not extracted images. The
  icon will clear any polygons or bounding boxes drawn on the map.
The controls on the mapview, which is explained in the Using the GeoTIFFs Feature section, allows a user to obtain their desired image.
Controls Fields
Date: The date on the map for the image the user wants to extract. Changing the date updates the map.
Date Range: Date range for which to extract images. For example, the user could extract images of Australia for the first week of September 2018.
Sensor: The sensor to use for extracting the image. Changing the sensor also updates the map. For more information:
Product: The product to use for extracting the image. Changing the product also updates the map. For more information:
Clicking the Coastlines checkbox delineates the coastlines on the map. This is useful when a piece of land is covered by clouds.
Background: An option to display or hide the background. This is useful when a user wants to view the layers without any background image, or only view the coastlines.
Process of Tagging an Image
A user can tag images in three different areas of the ImageLabeler application. They can begin by navigating to the specific event that they wish to work on (explained in detail in the Event Pages section) and turn on work mode  to begin marking images as present or not present.
The last area in which a user can tag an image is within the Mapview feature directly on the map. When a user wants to set the event or tag Status of a bounding box or polygon drawn on the map, the user clicks on the highlighted area and a list of events will pop up that give the user options for setting the status of an image. These options include selecting the event from the list and selecting if the event is present (Yes), not present (No), or untagged. Once the selection is made, the image is sent to the event page and placed under one of the tabs for that specific event (the tabs are covered in detail in the Using Event Pages section).
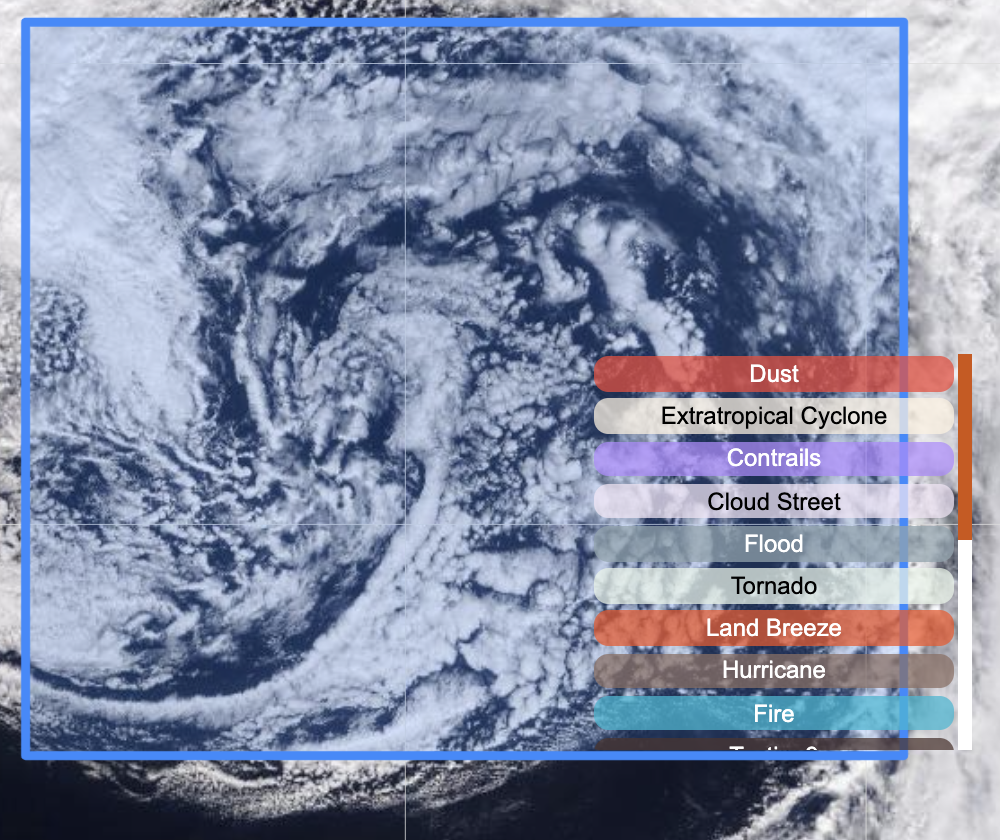
Figure 16: List of events to tag a bounding box
Bounding Boxes
The user can draw rectangular bounding boxes on an image to indicate exactly where a particular Earth science event occurs.
In order to draw bounding boxes, the user clicks on the  on the image’s detail view that pops up after selecting images on event pages. It is at bottom next to the downlaod button (see Figure 8).
The user can select a label (Present or Not Present) and draw a polygon to localize an event. User must click on  to save the changes.

Figure 17: Bounding box
The user can download the bounding boxes for an image in the VOC format by clicking on the  button on top-right corner on image window.